Preferred Plate Sizes
- General Overview
- Tips and Tricks
- Related Tools
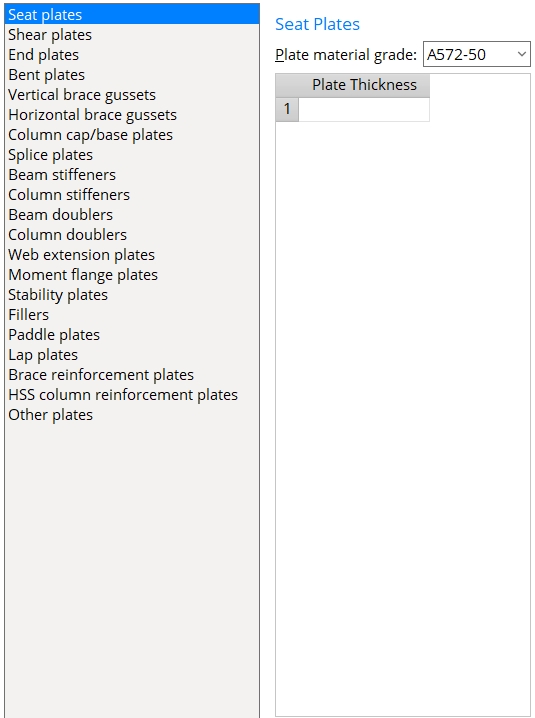
Plate material grade: A36 or A572-42 or A752-50 or etc. Connection design uses the steel grade that is selected here as the default for the design of the specified plate connection.
Note : The options on this list box's menu (
) come from Home > Project Settings > Job > Material Grades > Plate Grades .
Plate Thickness : Sets the available thicknesses available for the design of the specified plate connection. Connection design determines the required thickness, then refers to this window and selects the closest listed thickness that is equal to or greater than the required thickness.
Note : Leaving the list blank allows Connection design to determine a suitable plate thickness.
| Editing the Plate Thicknesses lists | |
| To change a plate listing: | Click to select the previous entry, then type a plate thickness. |
| To add a new plate: | Click the first empty cell, then type in a plate thickness. |
| To delete an plate from the list: | Double-click to select the previous entry, then press Backspace or click to select the plate thickness and right-click and select "Delete selected row(s)". |
Other Plates
Butt plate material grade: A36 or A572-42 or A752-50 or etc. Connection design uses the steel grade that is selected here as the default for the design of column butt plates .
Stitch plate material grade: A36 or A572-42 or A752-50 or etc. Connection design uses the steel grade that is selected here as the default for the design of stitch plates on horizontal braces or vertical braces .
Other plate material grade: A36 or A572-42 or A752-50 or etc. Connection design uses the steel grade that is selected here as the default for the design of web-to-gusset plates for wide flange or stem-vertical tee vertical braces , tee fittings on HSS braces, extended welded tees for clip angles or etc., and angle seat stiffeners .


|
|
OK (or the Enter key) closes this screen and applies the settings.
Cancel (or the Esc key) closes this screen without saving any changes.
Reset undoes all changes made to this screen since you first opened it. The screen remains open.
- Use miscellaneous plates list (applies Preferred Plate Sizes to beam connections)
- Use miscellaneous plates list (applies Preferred Plate Sizes to column connections)
- Use miscellaneous plates list (applies list to horizontal brace connections)
- Use miscellaneous plates list (applies list to vertical brace connections)
- Use miscellaneous plates list (applies list to joist connections)
- Suitable plate thickness not found (connection error message for Beam Edit )

